Garlic Herb Breadsticks
Highlighted under: Comfort Kitchen
I love making Garlic Herb Breadsticks because they bring a wonderful aroma and flavor to any meal. Each bite offers the perfect balance of garlic and herbs, making these breadsticks irresistible. Whether served as a side dish or enjoyed on their own, they never fail to impress my family and friends. The best part is that they are incredibly easy to whip up, requiring only a few simple ingredients. Trust me, once you serve these warm, buttery breadsticks, everyone will be asking for the recipe!
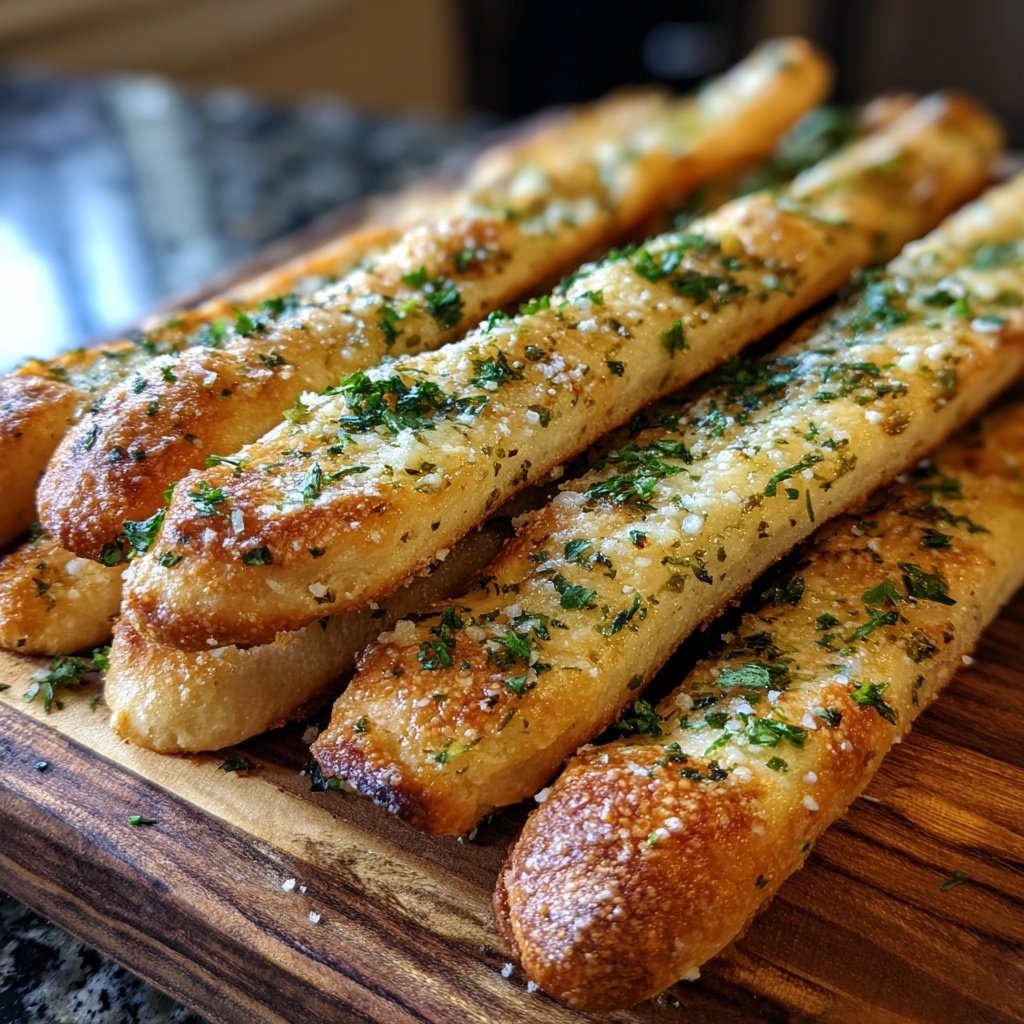
I distinctly remember the first time I made these Garlic Herb Breadsticks. The smell of freshly baked bread, combined with the aromatic garlic and herbs, filled my kitchen and made my mouth water. I discovered that allowing the dough to rise just enough creates that fluffy texture we all crave. The secret weapon? A generous brush of garlic butter right before baking, which not only adds flavor but also gives the breadsticks that beautiful golden color.
Over the years, I've experimented with different herb blends, and let me tell you, fresh herbs elevate these breadsticks to a whole new level. Thyme and rosemary are favorites of mine, but feel free to get creative! Serve them warm alongside pasta or soup, and you'll see why they quickly became a staple in my home.
Why You'll Love These Breadsticks
- Irresistible aroma that fills your kitchen
- Perfectly fluffy texture with a crispy exterior
- Versatile enough to pair with any meal
Understanding the Ingredients
The key to exceptional Garlic Herb Breadsticks lies in the quality of your ingredients. Using all-purpose flour creates the ideal texture, providing a balance between fluffiness and structure. If you want a more robust flavor, consider using bread flour, which has a higher protein content. The yeast is essential for the leavening process, so ensure it’s fresh. Frothing the yeast mixture indicates it's active; if it doesn’t fizz, you may need to start over with new yeast.
Garlic and herbs play a pivotal role in flavoring these breadsticks. Fresh garlic gives a more aromatic punch compared to powdered garlic, while fresh parsley adds a bright note. If you don’t have fresh herbs, dried ones can substitute, but use them sparingly as they’re more concentrated. Herbs like thyme or basil can also be great alternatives to oregano, tailoring the breadsticks to your taste preferences.
Technique Tips for Perfect Breadsticks
Kneading is an important step in developing the gluten structure, which will give your breadsticks their chewy texture. When kneading, aim for the dough to become smooth and elastic, which should take about 5 minutes. If the dough is too sticky, you can sprinkle a little extra flour as needed. However, be careful not to add too much flour, as this can lead to dense breadsticks.
For the best results, letting the dough rise in a warm, draft-free area is crucial. An oven preheated to the lowest setting (then turned off) or a sunny spot on the countertop works wonders. The dough should double in size, which typically takes around 15 minutes. Keep an eye on it, as over-proofing can lead to overly airy breadsticks that collapse during baking.
Ingredients
Gather these simple ingredients to create the most delicious garlic herb breadsticks.
Ingredients
- 2 cups all-purpose flour
- 2 teaspoons active dry yeast
- 1 teaspoon sugar
- 3/4 teaspoon salt
- 1 cup warm water (110°F)
- 3 tablespoons unsalted butter, melted
- 2 cloves garlic, minced
- 1 tablespoon fresh parsley, chopped
- 1 teaspoon dried oregano
Make sure to have all ingredients ready for a seamless baking experience!
Instructions
Follow these easy steps to bake your own garlic herb breadsticks.
Prepare the Yeast Mixture
In a small bowl, combine the warm water, sugar, and yeast. Let it sit for about 5 minutes until it becomes frothy.
Mix Dry Ingredients
In a large mixing bowl, whisk together the flour and salt.
Combine and Knead
Once the yeast mixture is frothy, pour it into the bowl with dry ingredients along with the melted butter. Mix until a dough forms, then knead on a floured surface for about 5 minutes.
Let the Dough Rise
Place the kneaded dough in a greased bowl, cover with a damp cloth, and let it rise in a warm area for about 15 minutes or until doubled in size.
Shape the Breadsticks
After the dough has risen, punch it down and divide it into 12 equal pieces. Roll each piece into a long strip and place them on a greased baking sheet.
Prepare Garlic Butter
In a small bowl, mix together the melted butter, minced garlic, parsley, and oregano. Brush this mixture generously over each breadstick.
Bake
Preheat the oven to 375°F (190°C) and bake the breadsticks for 15 minutes, or until golden brown.
Cool and Serve
Let the breadsticks cool slightly before serving. Enjoy them warm with your favorite dipping sauce!
Now you have the perfect accompaniments for your meals!

Pro Tips
- For an extra flavor boost, sprinkle some grated Parmesan cheese over the breadsticks before baking.
Serving Suggestions
These Garlic Herb Breadsticks are an excellent accompaniment to pasta dishes, particularly marinara or alfredo. They can also elevate a simple salad, providing both texture and flavor. To take them up a notch, serve them with a homemade dipping sauce, like a garlic-infused olive oil or a creamy ranch dressing, adding another layer of enjoyment to your meal.
If you’re hosting a gathering, consider presenting these breadsticks as part of a larger bread basket, alongside other varieties such as cheesy garlic knots or herbed focaccia. Their inviting aroma will draw guests in, while their fluffy texture and rich flavors make them a standout starter.
Make-Ahead and Storage Tips
These breadsticks can be prepared ahead of time, making them perfect for busy evenings or entertaining. After shaping the dough into strips, you can cover and refrigerate them for up to 24 hours before baking. When you're ready, simply let them rise at room temperature for about 30 minutes before baking to ensure they puff up nicely.
If you have any leftovers, store them in an airtight container at room temperature for up to two days. To reheat, wrap them in foil and place them in a preheated oven at 350°F (175°C) for about 10 minutes. This method restores their initial softness and warmth, making them delightful once again.
Common Troubleshooting
If your breadsticks do not rise properly, it could be due to expired yeast or insufficient warm temperature. Always check the yeast's expiration date before starting. If you feel your kitchen is too cool, consider warming your oven slightly and then turning it off to create a cozy environment for the dough to rise.
In the event your breadsticks turn out dense, it’s often a signal that you added too much flour during kneading. Next time, make sure to measure flour accurately and avoid adding excess flour while kneading. Adjusting the kneading time to achieve the right texture will also help ensure light and fluffy results.
Questions About Recipes
→ Can I use whole wheat flour?
Yes, you can substitute half of the all-purpose flour with whole wheat flour for a healthier option.
→ Can I freeze the dough?
Absolutely! You can freeze the dough before the second rising step. Just let it thaw and rise when you're ready to bake.
→ What can I serve with these breadsticks?
These breadsticks pair wonderfully with pasta, soups, or as a snack on their own with marinara sauce.
→ How do I store leftover breadsticks?
Store any leftovers in an airtight container at room temperature for up to 2 days. They can also be reheated in the oven.
Garlic Herb Breadsticks
Created by: Phoebe Turner
Recipe Type: Comfort Kitchen
Skill Level: Beginner
Final Quantity: 12 breadsticks
What You'll Need
Ingredients
- 2 cups all-purpose flour
- 2 teaspoons active dry yeast
- 1 teaspoon sugar
- 3/4 teaspoon salt
- 1 cup warm water (110°F)
- 3 tablespoons unsalted butter, melted
- 2 cloves garlic, minced
- 1 tablespoon fresh parsley, chopped
- 1 teaspoon dried oregano
How-To Steps
In a small bowl, combine the warm water, sugar, and yeast. Let it sit for about 5 minutes until it becomes frothy.
In a large mixing bowl, whisk together the flour and salt.
Once the yeast mixture is frothy, pour it into the bowl with dry ingredients along with the melted butter. Mix until a dough forms, then knead on a floured surface for about 5 minutes.
Place the kneaded dough in a greased bowl, cover with a damp cloth, and let it rise in a warm area for about 15 minutes or until doubled in size.
After the dough has risen, punch it down and divide it into 12 equal pieces. Roll each piece into a long strip and place them on a greased baking sheet.
In a small bowl, mix together the melted butter, minced garlic, parsley, and oregano. Brush this mixture generously over each breadstick.
Preheat the oven to 375°F (190°C) and bake the breadsticks for 15 minutes, or until golden brown.
Let the breadsticks cool slightly before serving. Enjoy them warm with your favorite dipping sauce!
Extra Tips
- For an extra flavor boost, sprinkle some grated Parmesan cheese over the breadsticks before baking.
Nutritional Breakdown (Per Serving)
- Calories: 190 kcal
- Total Fat: 7g
- Saturated Fat: 4g
- Cholesterol: 15mg
- Sodium: 210mg
- Total Carbohydrates: 27g
- Dietary Fiber: 1g
- Sugars: 1g
- Protein: 4g